
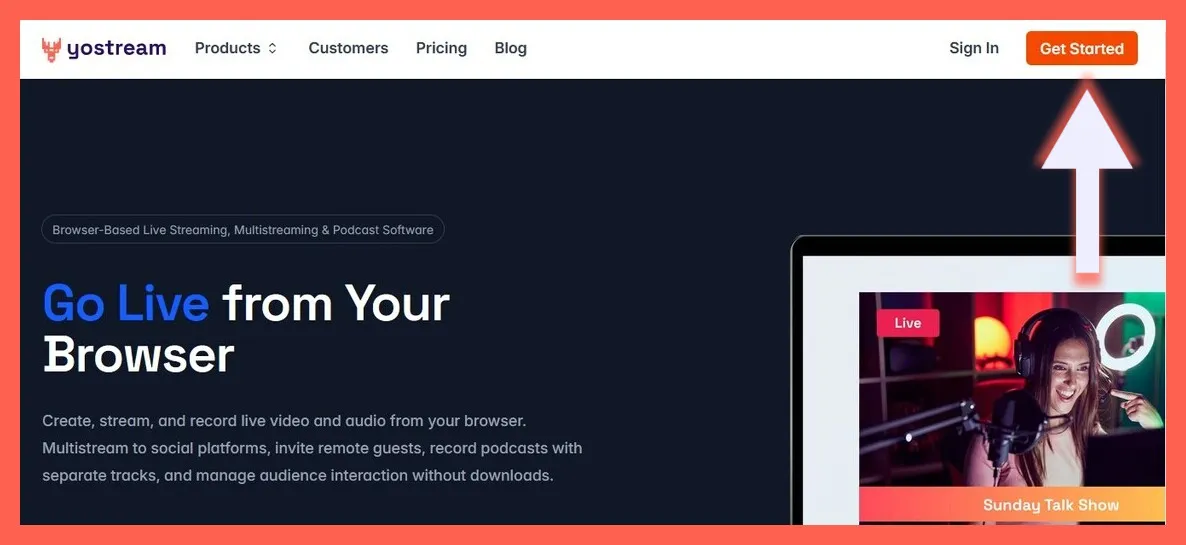
Abbreviation of “web-based seminar,” a webinar is an online event that takes place in real-time and enables hosts to connect with participants and share information via chat, video, and audio. Live webinars provide an immersive experience where participants may actively participate, ask questions, and receive immediate feedback fostering quality engagement.
There are many platforms on the Internet offering webinar services to clients worldwide. These dedicated webinar platforms (used by 78% of hosts) are always preferred over video platforms like YouTube or Vimeo, which only 5% of webinar hosts use. Among them, Yostream, a browser-based live streaming software, also offers a budget-friendly smooth, and reliable live webinar experience where clients feel connected with their audiences throughout the session and even after it culminates.
With a user-friendly interface, interactive features, and extensive customization options, Yostream believes in taking the webinar game to the next level with utmost simplicity. Let’s have a quick look at how users can host their first live webinar on Yostream with simple steps:
Pricing plans for hosting a live webinar
The Free and Basic plans don’t offer the webinar service. It’s available for only Pro, Premium, and Enterprise plans. With the Pro plan, a maximum number of 250 people can view the webinar on Yostream whereas, for the Premium and Enterprise plans, the number of viewers is 1000 and 10,000 respectively.
A host can still gather a large audience and generate a huge viewership by multistreaming the live webinar to social media channels such as Facebook, YouTube, X, and other custom RTMP destinations.
What steps are involved in hosting a live webinar?
Step 1.
Type yostream.io in the address bar of your browser, and press ‘enter’. You can check here the list of browsers supported by Yostream.

Step 2.
Click ‘Get Started’ at the top-right corner of your screen.
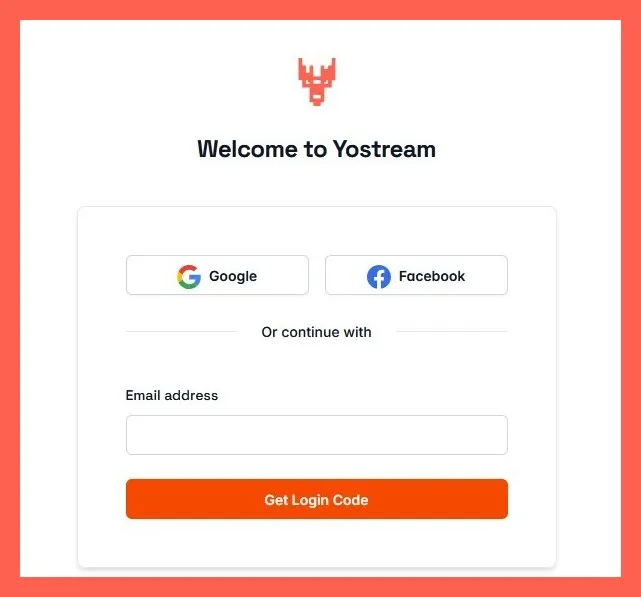
Step 3.
You can proceed further by using your Google or Facebook accounts, or by entering whichever Email ID you prefer. In this case, we’ll enter an Email ID and click ‘Get Login Code’ at the bottom.
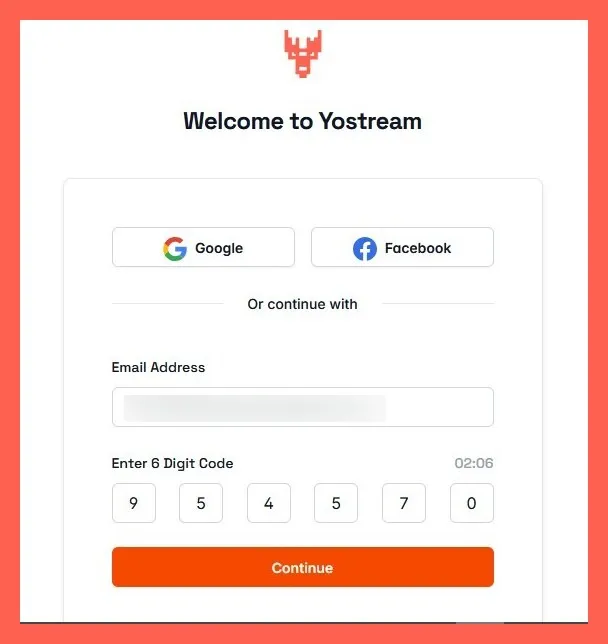
Step 4.
You’ll receive the Yostream login code in the Email you’ve just provided. Enter the 6-digit code before clicking ‘Continue’.
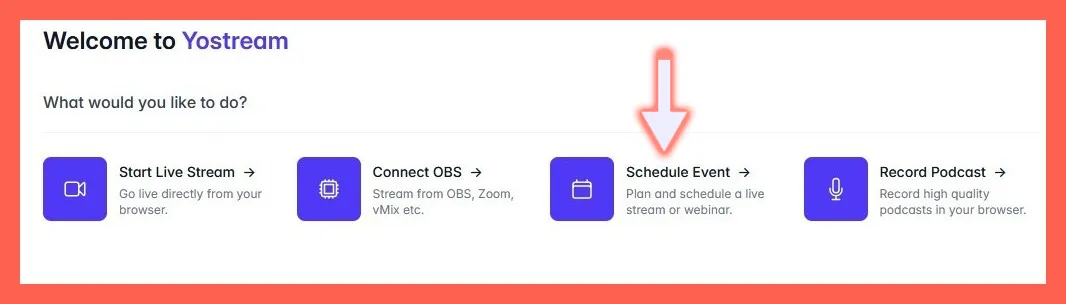
Step 5.
You’ve now entered the dashboard. Select the ‘Schedule Event’ option.
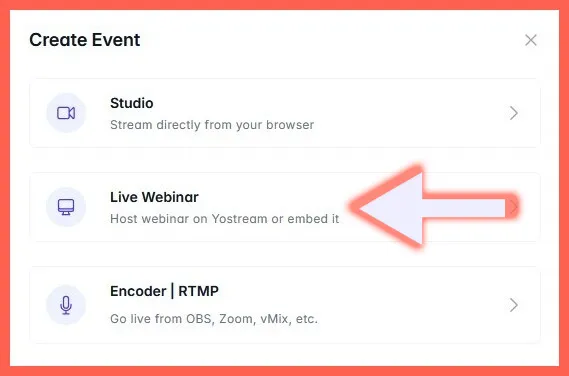
Step 6.
Select ‘Live Webinar’.
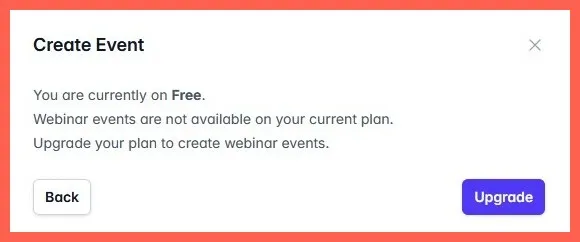
Webinar is available only for premium plans. If you're using the free plan, you'll see the following box.
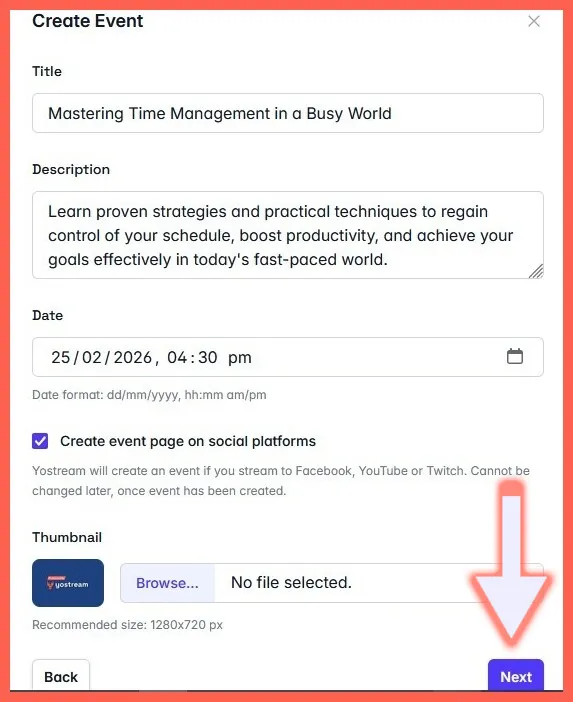
Step 7.
You’re now seeing the ‘Create Event’ form. Write down the title of your live webinar, provide an apt description, and set your desired date and time. You can tick the box to create an event page on your social media platforms. If you haven’t added yet, you can check some helpful guides on how to connect social media platforms to your Yostream account. Upload your customized thumbnail and click ‘Next’ at the bottom-right corner.
Step 8.
Select your connected accounts and click ‘Save’ at the bottom-right corner.

Step 9.
On your dashboard, you can see the webinar has been scheduled. You’ll also get a confirmation Email of the same. Please note that the event can’t start automatically at its scheduled time unless you’ve manually clicked ‘Enter Studio’.

Step 10.
After clicking ‘Enter Studio’, you’ll be redirected to a new screen where you've to select mic and camera inputs along with providing a username. Only then, you'll be able to click 'Join Room' and proceed.

Step 11.
On the left panel of your studio, toggle to go On Air.

Step 12.
Once you’ve finished the custom branding of your live webinar with logo, banner, theme, background, etc., click ‘Go Live’ at the bottom.

Step 13.
Click 'Connect Account' and start adding social media platforms and custom RTMP destinations where you wish to multistream your webinar.

Select the boxes of connected accounts, and click 'Start Event'. Congratulations! Your webinar is now live.

This Might Appeal To You
- Check whether your system is meeting the minimum requirements to host a live webinar: What Are The System Requirements For Live Streaming With Yostream?
- Maximize audience engagement on your webinar: How To Spread Your Live Webinar Like A Wildfire?